

How To Wrap a Gift Card
Posted on 9.18.24
Updated on 11.24.25
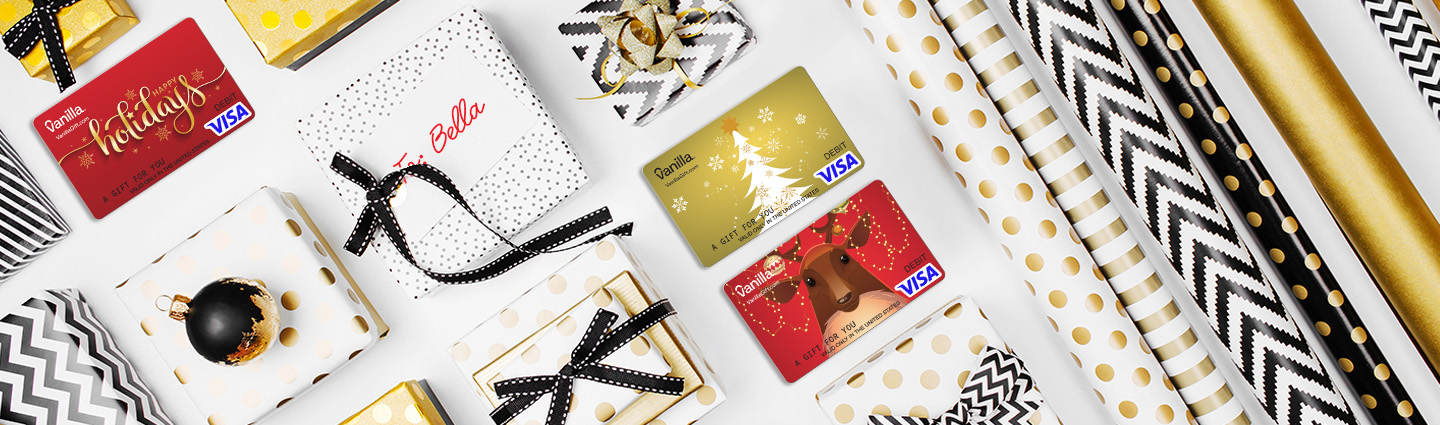
’Tis the season to delight everyone in your life with holiday gift cards. Perfect for friends and loved ones, it’s a terrific way to share a smile. Take your gifting to the next level with a creative approach to wrapping. So exactly how do you wrap a gift card? Visa Gift Card Boxes can elevate gifting for formal events or pack in a surprise for Secret Santa gift exchanges. If you’re not dashing off to your next event and want to hand-pick a jolly Gift Card and Gift Card box, we make it simple to do that too. For example, try the Santa Cheer Gift Card with the Silver Foil Gift Card Box. Or the Happy Dots Holidays Gift Card with the Red Silver Gift Card Box. All our Gift Cards come with the option to purchase a Gift Card box. There are multiple fun designs to choose from!
- Vanilla Visa Gift Cards are a versatile, festive way to spread holiday cheer.
- Elevate your presentation with creative wrapping ideas like origami folds, mini stockings, or mason jar displays.
- For group gifting, try themed options such as gift card trees or wreaths.
- Pair holiday gift cards with decorative boxes or DIY touches to make them feel personal and thoughtful.
- Short on time? Choose Vanilla Gift Card + Gift Card Box combos for an easy, elegant solution.
How to Wrap a Gift Card
For those who love a little DIY and are wondering how to give a gift card in a way that’s unforgettable, there are many options for highlighting them with seasonal decorations or even with crafty items around your house. By thoughtfully choosing your presentation, you add an element of surprise and excitement. These festive approaches to packaging also make Visa gift cards feel more personal and meaningful.
1) Origami Wrapping Paper
You'll need:
- Square origami/decorative paper (6–8 in works well)
- Double-sided tape or a sticker seal
- Ribbon or twine (optional)
- Gift tag (optional)
A. Envelope Fold (card opens like a greeting card)
- Center the card on the paper (logo side down), edges parallel.
- Fold left and right sides in toward the center so they slightly overlap the card edges.
- Fold the bottom up, covering about one-third of the card. Secure with a small piece of double-sided tape.
- Fold the top down to meet the bottom fold, creating an envelope flap. Seal with a sticker/tape.
- Finish: Wrap a thin ribbon around the short side and tie a small bow; add a gift tag.
B. “Candy Twist” (looks like a wrapped candy)
- Cut a rectangle of paper that’s ~2.5× the card’s width and ~1.5× the card’s height.
- Place the card centered horizontally; roll the paper snugly around it to form a tube. Tape the seam.
- Twist both ends like a toffee wrapper.
- Tie bows at each twist with ribbon or baker’s twine; trim tails neatly.
- Finish: Tuck in a mini gift tag under one bow.
Pro tip: If you’re short on time, slip the card into a Gift Card Box first, then wrap the box using either style for crisp lines.
2) Gift Card Tree
You'll need:
- Mini tree (tabletop size) with stand
- Ribbon, yarn, or ornament hooks
- Mini clothespins (optional)
- Gift tags (optional)
Steps
- Fluff and stabilize the mini tree in its stand.
- Pre-loop ribbon through each card (or attach mini clothespins/hooks).
- Hang cards evenly around the tree, alternating heights for balance.
- Add accents (small ornaments, bows) to fill gaps and prevent crowding.
- Top it off with a small bow or tag noting the recipient(s).
- Display on a table or entry console for a festive reveal.
Pro tip: For a polished look, place each card in a coordinating Gift Card Box before hanging; it adds weight and keeps cards facing forward.
3) Gift Card Wreath
You'll need:
- Wreath base (grapevine, evergreen, or wire)
- Floral wire or twist ties
- Ribbon for a bow
- Mini clothespins or hooks
- Ornaments/greenery (optional)
Steps
- Prep the base: Fluff greenery or clean grapevine to remove loose bits.
- Place anchor points: Tie short lengths of floral wire in 6–8 evenly spaced spots.
- Attach gift cards: Clip or hook cards, then secure lightly to anchor wires so they don’t spin.
- Layer décor: Add small ornaments, pinecones, or berries; balance color around the circle.
- Add bow and hanger: Tie a statement bow at the bottom/top; add a sturdy loop for hanging.
- Final check: Ensure cards are legible and not overlapping.
Pro tip: Mix holiday gift card designs for pops of color—great for teacher gifts, raffles, or office prize walls.
4) Mini Stocking Gift Card Ornament
You'll need:
- Mini stocking (storebought or DIY felt)
- Needle & thread or fabric glue (DIY)
- Ribbon or ornament hook
- Tissue paper (a small piece for shaping)
- Gift tag (optional)
Steps
- If DIY: Cut two stocking shapes from felt; blanket-stitch or glue edges, leaving the top open.
- Add hanger: Sew or glue a ribbon loop to the top corner for hanging.
- Shape the stocking: Tuck a small piece of tissue inside to help it hold form.
- Insert the card, so the design peeks out slightly.
- Personalize: Add an initial tag or tiny charm to the cuff.
- Hang on the tree or present on top of another wrapped gift.
5) Gift Card Picture Frame
You'll need:
- 4×6 or 5×7 frame (with glass or acrylic)
- Decorative paper for a mat (or precut mat)
- Photo corners or removable double-sided tape
- Ribbon/bow (optional)
Steps
- Cut the mat: Trim a window slightly smaller than the card (about 2 × 3.25 in) so it holds snug.
- Mount the card: Use photo corners to secure the card on the back of the mat (protects finish).
- Assemble the frame: Clean the glass, insert the mat with card, and close the tabs.
- Decorate the frame: Add a small seasonal bow or stick-on embellishments to a corner.
- Wrap or present: Wrap the frame like a gift or tie a ribbon around it with a tag.
- Optional upgrade: Use a custom photo gift card so the image and frame theme match.
6) Mason Jar Gift Card Holder
You'll need:
- Pintsize mason jar with lid
- Filler (wrapped candy, paper shred, mini ornaments, or battery LED string)
- Card sleeve (clear) or small cardstock stand
- Twine/ribbon and gift tag
Steps
- Prep the jar: Wipe the inside so it’s crystal clear.
- Add a base layer of filler (about 1–2 inches).
- Position the gift card: Slide into a clear sleeve or tape to a small cardstock stand; place card face outward against the glass.
- Fill around the card gently so it stays visible and upright.
- Top it off: Add a final sprinkle of filler; close the lid.
- Finish: Wrap twine around the lid ring, tie on a gift tag, and add a tiny ornament or sprig.
- Light up option: If using LEDs, place the battery pack at the back and thread lights around the card.
Pro tip: Keep food items (like unwrapped candy) separate from the card; use wrapped candies or a divider for a clean, gift ready look.
Short on Time? Shop Visa Gift Cards!
If you’re in a rush to order or just need a quick, festive way to wrap a gift card, we’ve got you covered. Get everything you need in just one click with our festive Visa Gift Card + Gift Card Box options. These perfectly paired designs are easy to order and will delight anyone on your list. Visa Gift Card Boxes can elevate gifting for formal events or pack in a surprise for Secret Santa gift exchanges. For example, try the Gold Tree Bow Gift Card + Gift Box or the Merry Plaid Bow Gift Card + Gift Box when you want a classic holiday look.
Stay Creative When Wrapping Gift Cards
Looking for unique ideas to wrap gift cards? Consider building Vanilla Visa Gift Card baskets for parties or placing them in a festively decorated tray. You can find inspiration all around your home, from home décor to cookie baking. No matter if you choose to dress up your gift card with festive wrapping paper or adorn a wreath or mini tree with multiple gift cards, it is a unique way to enhance the gifting experience — fun for you and a joy for your recipient. Be sure to shop all our holiday gift cards to find the perfect choice for every occasion this season.
Frequently Asked Questions
How long will it take to receive my Vanilla Gift Card and Gift Card Box?
A: Shipping time during the holiday season will depend on the shipping method chosen.
USPS Standard – 5-6 business days. Orders equal to or greater than $200 are not eligible for standard shipping.
FedEx Expedited – 3-4 business days
FedEx Rush – 2-3 business days
Please order by the following dates with the corresponding shipping options to ensure you receive your order by December 24th:
USPS Standard – December 16 – Orders equal to or greater than $200 are not eligible for standard shipping.
FedEx Expedited – December 18
FedEx Rush – December 19
How can I make a gift card feel more personal?
A: To make a gift card feel more personal, consider pairing it with small gifts, adding a handwritten note, or using a themed gift card box.
Where can I buy Vanilla Gift Card boxes?
A: Vanilla Gift Card Boxes are available exclusively through our website.
What’s the easiest way to wrap a gift card if I’m short on time?
A: When you’re short on time, opt for ready-to-go Vanilla Gift Card + Gift Box combos for quick, polished gifting.
Can I wrap multiple gift cards together?
A: Yes – for multiple gift cards, you can create gift card trees, baskets, wreaths, and more.
Custom Gift Cards FAQ
Can I choose the amount on a custom Visa Gift Card or eGift Card?
A: Yes, the custom Gift Cards and custom eGift Cards are available in the same denominations as the Visa Gift Card designs on the Vanilla Gift site, between $10 - $500.
How long will it take to receive my custom Visa Gift Card or eGift Card?
A: Shipping time for physical custom cards will depend on the shipping method chosen.
USPS – $1.95 per card, with cap of $5.95,
Orders $200 or more are shipped via FedEx
FedEx Expedited: 3-4 Business Days - $10.95
FedEx Rush: 2-3 Business Days - $17.95
Most eGift Card orders are delivered within 5 minutes but can take up to 24 hours.
Are Visa Custom Gift Cards or eGift Cards reusable?
A: No, Vanilla Visa Custom Gift Cards and Custom eGift Cards cannot be reloaded. If you want to give multiple custom-made gift cards of the same design, consider ordering more than one at a time.
Do I need to activate my custom Visa Gift Card or eGift Card?
A: Yes, the customer must activate their physical custom gift cards at balance.VanillaGift.com or by calling the toll-free phone number on the back of the Physical Gift Card (1-833-322-6760). Customer will need to provide the Gift Card Number, Valid Through Date, and Security Code located on the back of your gift card.
Vanilla Visa eGift Cards do not need to be activated prior to first use. They are activated upon purchase and shipped to the recipient’s email ready to use.
Where can custom Visa Gift Cards or eGift Cards be used?
A: Visa Gift Cards can be used anywhere Visa debit cards are accepted within the United States and the District of Columbia. Visa Gift Cards may not be used for recurring billing or at ATMs.